

Creating a Bull queue in your Node.js application is a smart strategy for managing background tasks efficiently and effectively. The Bull library, which leverages Redis for its backend, offers a robust platform for queuing up tasks like email dispatch, file processing, or report generation. This setup not only ensures tasks are executed either sequentially or concurrently but also facilitates retry mechanisms for tasks that fail. In this guide, we delve into the reasons for using Bull and provide a step-by-step approach to integrating it into your Node.js project.
Why Use Bull?
Asynchronous Processing: Bull allows you to handle tasks asynchronously, which means your main application thread is not blocked.
Scalability: Bull can distribute tasks across multiple workers, making it easier to scale your processing power up or down as needed.
Reliability: Tasks in Bull are persistent, meaning they are not lost even if your server restarts unexpectedly. Bull also supports automatic retries for failed jobs
Rate Limiting: Bull provides built-in support for rate limiting tasks, which is crucial for operations that can only be performed at a certain rate (e.g., API requests to third-party services that have rate limits).
How to Create a Bull Queue?
To create a Bull queue, you'll need a Redis server as Bull uses Redis to store its state and queue data. Here's a basic guide on setting up a Bull queue:
Step 1: Install Bull and Redis
First, ensure you have Redis installed and running. Then, install Bull in your Node.js project:
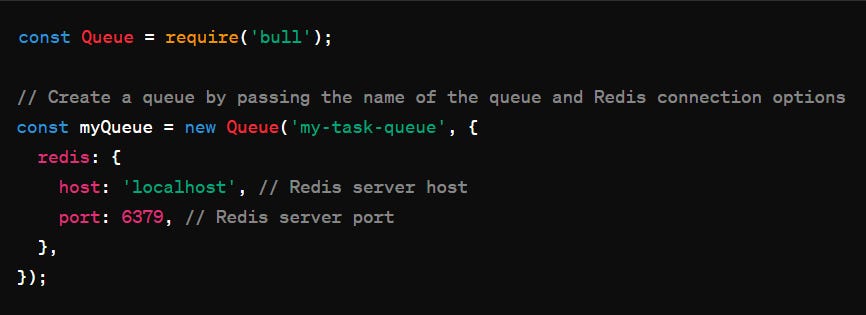
npm install bullStep 2: Create a Queue
You can create a queue by simply instantiating a Bull queue object. Here's how you might set it up:
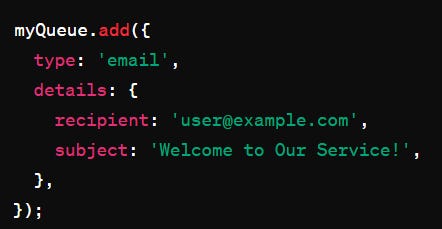
Step 3: Add Jobs to the Queue
You can add jobs to the queue with data that your background task will process:
Step 4: Process Jobs in the Queue
To process jobs, you define a processing function that takes a job and a done callback

In this snippet, each job assumed to represent an email sending task is processed.
Example:
Create a worker that generates thumbnails with the image-thumbnail module
Step 1: Install Required Packages
You'll need to install Bull for queue management and image-thumbnail for generating thumbnails. If you haven't already set up Redis, ensure it's installed and running as Bull depends on it.
npm install bull image-thumbnailStep 2: Create a Queue
Now, you need to set up a Bull queue that will handle the jobs for thumbnail generation.
Here's how to create a queue:
const Queue = require('bull');
const fileQueue = new Queue('fileProcessing', 'redis://127.0.0.1:6379');
Step 3: Define Job Processing Logic
Each job in the queue will be processed by a function you define. This function will generate thumbnails based on the job's data. # code below
Thumbnail Generation: For each specified width, it generates a thumbnail using image-thumbnail and saves it next to the original file with the width appended to the filename.
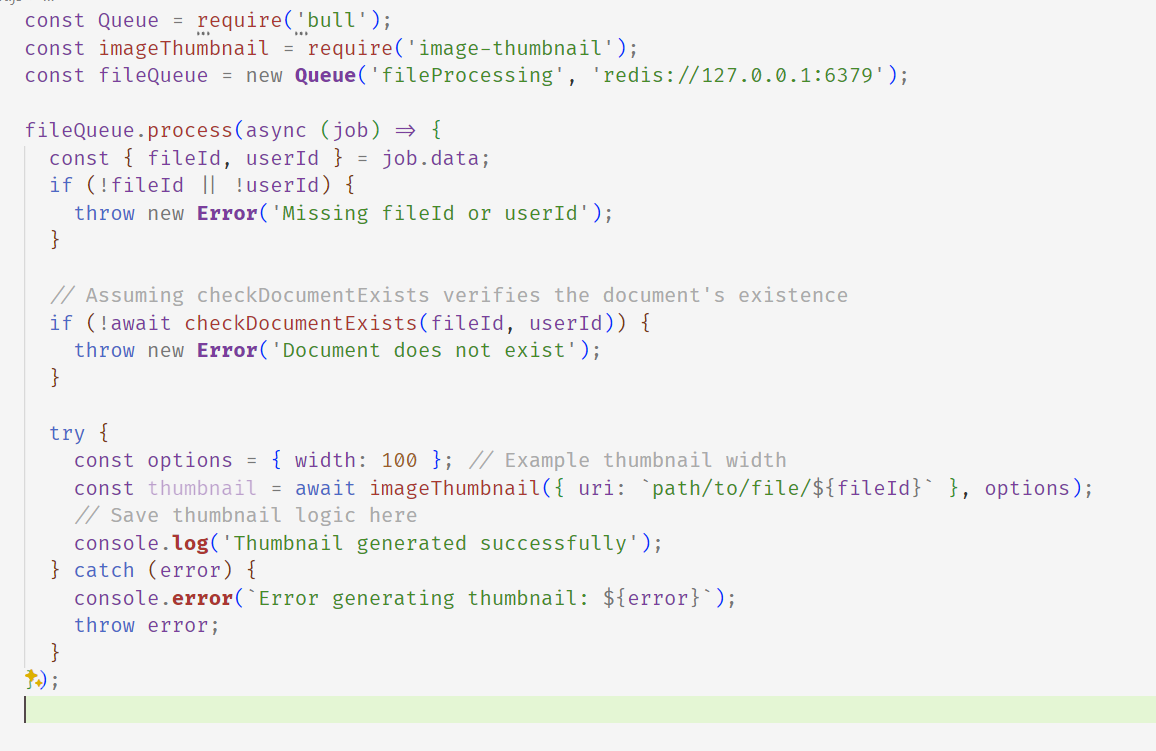
fileId and userId in the job data. Checks the existence of the document with checkDocumentExists, a function you need to implement. Generates a thumbnail using image-thumbnail for each job and logs success or failure.Step 4: Add Jobs to the Queue
To actually process thumbnails, you need to add jobs to the queue with the necessary data (fileId and userId).
Example of adding a job to the queue:
fileQueue.add({
 fileId: '123', // Replace with actual fileId
userId: 'abc' // Replace with actual userId
});
Notes:
A new instance of the
Queueclass is created with the name'fileProcessing'and a Redis connection URL'redis://127.0.0.1:6379'. This queue will be used to process jobs related to file processing.Inside a
tryblock, athumbnailis generated using theimageThumbnailfunction. The function is called with an object containing theuriproperty, which specifies the path to the file identified byfileId. Additionally, anoptionsobject is provided with awidthproperty set to100, indicating the desired width of the thumbnail.
Resources :